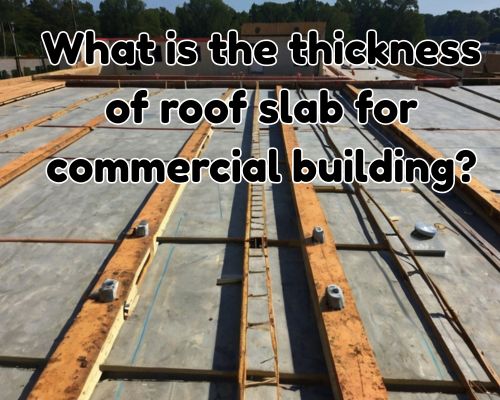
What is the Thickness of Roof Slab for Commercial Building? A Deep Dive for New Jersey Projects
When it comes to commercial construction in New Jersey, understanding structural specifications like roof slab thickness is essential—not just for compliance and performance but also for longevity, safety, and cost efficiency. So, what is the standard thickness of a roof slab in a commercial building?
While it may seem like a simple measurement, the roof slab thickness in commercial structures depends on multiple variables including building codes, structural load demands, architectural design, and regional climate considerations. In New Jersey, where the weather fluctuates from humid summers to snowy winters, slab design is influenced by environmental stressors and local code requirements.
With Charles Jimerson of CJ Commercial Roofing NJ, we’ll unpack:
- The typical roof slab thickness for commercial buildings
- Factors influencing slab design
- Building code references in New Jersey
- Types of materials used
- Local considerations unique to New Jersey’s climate and construction norms
Typical Thickness of Roof Slabs in Commercial Construction
In general, the standard roof slab thickness for commercial buildings in the U.S. ranges between 5 inches and 8 inches (127 mm to 203 mm). However, New Jersey-based commercial projects often adopt 6-inch slabs as a minimum, scaling up depending on load-bearing demands or special architectural considerations.
Why the Range?
The variation is due to:
- Dead loads (weight of the structure itself)
- Live loads (people, equipment, or HVAC units on the roof)
- Environmental loads (snow, wind uplift)
A flat roof on a commercial warehouse in Newark, NJ, for example, might use a 6-inch reinforced concrete slab. In contrast, a multi-story office building in Jersey City may require a post-tensioned concrete slab closer to 8 inches to handle mechanical installations and future tenant improvements.
Key Factors That Influence Slab Thickness
Several engineering and environmental parameters come into play:
1. Structural Load Requirements
Every roof slab is engineered to handle expected live and dead loads. The American Concrete Institute (ACI 318) offers guidelines, and structural engineers in New Jersey often refer to this in tandem with IBC (International Building Code) provisions.
2. Span Between Supports
Longer spans without intermediate support beams require thicker slabs or advanced reinforcement like post-tensioning. In commercial retail outlets or large logistics centers in Edison, NJ, slabs may increase in thickness to prevent deflection over long spans.
3. Roof Type & Usage
A green roof or rooftop terrace requires additional thickness to support soil, plantings, and pedestrian traffic. These applications are increasingly popular in urban centers like Hoboken, where real estate is optimized vertically.
4. Climate and Weather Conditions
In New Jersey, snow loads play a significant role. According to the New Jersey Uniform Construction Code (NJ UCC), structures must account for average snowfall loads between 20 and 30 pounds per square foot, particularly in northern counties like Morris and Sussex.
For more, visit https://cjcommercialroofingnj.com/.
Material Considerations: Concrete Composition and Reinforcement
Most commercial roof slabs use reinforced concrete—a mix of cement, water, aggregates, and steel reinforcement (rebar or wire mesh). Here’s what commonly goes into a New Jersey commercial roof slab:
- Compressive strength: Usually 4,000 to 5,000 psi
- Reinforcement: Grade 60 steel rebar, spaced per structural load demands
- Slump: A medium slump (4 to 6 inches) ensures workable concrete without compromising strength
For projects requiring lightweight alternatives, lightweight concrete (using expanded shale or clay aggregate) is sometimes used, especially in retrofits or rooftop additions in older commercial buildings in cities like Trenton.
Local Building Code & Regulations in New Jersey
To legally construct commercial buildings in the Garden State, builders must comply with:
- NJ UCC (New Jersey Uniform Construction Code)
- IBC 2021 (as adopted statewide)
- ASCE 7 standards for minimum design loads
These codes regulate slab thickness indirectly by mandating load capacity, deflection limits, and allowable material stresses. For example, commercial roofs must meet wind uplift ratings prescribed for coastal zones like Atlantic City, where hurricane exposure is a concern.
It’s also worth noting that zoning ordinances and municipal building codes may add specific height and massing constraints, indirectly affecting slab thickness and overall roof design.
Real-World Examples from New Jersey
Let’s look at a few real-world applications that illustrate the range and logic behind slab thickness in local commercial construction:
✅ Logistics Facility in South Brunswick
- Slab Thickness: 6.5 inches
- Reinforcement: Double mat rebar grid
- Reasoning: Heavy equipment and HVAC units mounted on rooftop
✅ Tech Campus in Princeton
- Slab Thickness: 7.5 inches
- Reinforcement: Post-tensioned concrete
- Reasoning: Future adaptability for rooftop solar arrays and structural loading flexibility
✅ Mixed-Use Retail in Montclair
- Slab Thickness: 6 inches
- Reinforcement: Fiber-reinforced concrete
- Reasoning: Lightweight requirement due to existing substructure
How Slab Thickness Impacts Cost and Construction Timeline
Choosing a thicker slab increases material costs (more concrete and steel), labor (formwork, pouring, curing), and possibly inspection fees. However, the trade-off is durability and flexibility. In high-traffic commercial zones like Newark or Elizabeth, slab integrity directly translates to fewer long-term maintenance issues.
A typical cost estimate for roof slab construction in New Jersey (as of 2025) ranges from $7.50 to $12 per square foot, depending on thickness and design complexity. Specialized slabs (like post-tensioned or high-load green roof systems) can run higher.
Sustainable Trends in Commercial Roof Slabs
With New Jersey adopting green building initiatives under the Energy Master Plan (EMP) and Clean Energy Program, newer commercial buildings are integrating insulated roof decks, thermal mass concrete, and green roofing systems.
These sustainable approaches may demand slight variations in slab thickness—either to accommodate insulation materials or to support added mass from soil and vegetation. Municipalities like Morristown and Camden have already adopted green-friendly incentives for such structural innovations.
Conclusion: Precision Matters in Roof Slab Design
To answer the question directly: the roof slab thickness for a commercial building in New Jersey typically ranges from 6 to 8 inches, but that number can vary based on design purpose, location, building code, and intended roof usage.
More importantly, the “right” thickness is not a one-size-fits-all number—it’s an intersection of engineering precision, regulatory compliance, local climate adaptation, and cost-effective construction strategies.
If you’re planning a commercial build in New Jersey—from Paramus to Cherry Hill—work closely with a local structural engineer and code consultant to ensure the roof slab is not just thick enough, but also smartly designed for performance, durability, and future adaptation.