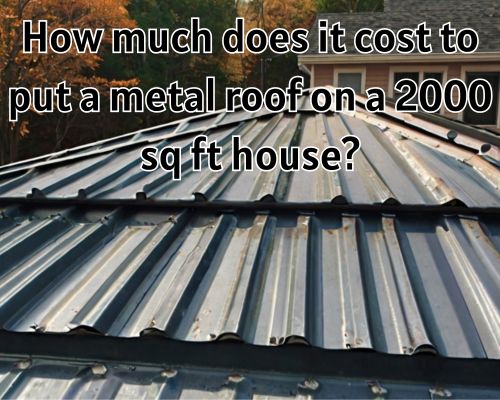
How Much Does It Cost to Put a Metal Roof on a 2000 Sq Ft House in New Jersey?
When it comes to roofing, one of the most important decisions homeowners make is choosing the material for their roof. Among the many options available, metal roofing has become an increasingly popular choice for homeowners in New Jersey. Whether you’re upgrading your existing roof or building a new home, it’s crucial to understand the costs involved in installing a metal roof on a 2000 sq ft house. With Charles Jimerson of CJ Commercial Roofing NJ, we’ll explore the factors influencing the cost of metal roofing, provide a cost breakdown, and highlight the key benefits of this long-lasting roofing option.
Why Choose a Metal Roof?
Before diving into the cost, let’s take a look at why so many homeowners in New Jersey are opting for metal roofs. Metal roofing offers a range of benefits, including durability, energy efficiency, and minimal maintenance. With harsh winters and intense summer storms common in New Jersey, a metal roof is an excellent choice due to its resilience against snow, rain, and high winds. Furthermore, metal roofs can last 40-70 years, depending on the material, compared to traditional asphalt shingles, which typically last 15-30 years.
Factors Influencing the Cost of a Metal Roof
The cost to install a metal roof on a 2000 sq ft house in New Jersey varies depending on several factors. Here are the primary aspects that impact the final price:
1. Type of Metal Roofing
The type of metal used for your roof significantly affects the overall cost. Common metal roofing materials include:
- Steel: The most widely used material, steel is affordable and highly durable. The average cost of steel roofing ranges from $5 to $12 per square foot.
- Aluminum: Slightly more expensive than steel, aluminum is lightweight, resistant to rust, and suitable for coastal regions. Prices typically range from $7 to $15 per square foot.
- Copper: One of the most expensive options, copper roofing offers exceptional aesthetic appeal and longevity, but it can cost anywhere from $15 to $30 per square foot.
The choice of metal plays a crucial role in determining the overall cost, so it’s essential to consider your budget and the specific requirements for your home.
2. Roofing Design and Complexity
A 2000 sq ft house may have a relatively simple roof design, but if your home has additional features such as multiple slopes, dormers, or skylights, it can increase the cost. Roofing complexity means more labor and materials, which can drive up the price. Roof designs such as gable, hip, and mansard require different techniques and materials, affecting both labor and installation time.
3. Labor Costs in New Jersey
Labor costs are another significant factor when determining how much it costs to install a metal roof. On average, labor costs for roofing contractors in New Jersey range from $50 to $150 per hour, depending on their expertise and location. Contractors in metropolitan areas like Newark and Jersey City may charge higher rates due to the cost of living and demand for services.
4. Roof Pitch and Accessibility
A roof’s pitch (the angle of the slope) and its accessibility can impact the installation cost. Steeper roofs are more difficult and dangerous to work on, so they may incur additional labor costs. In contrast, a flat or low-pitched roof is easier and safer to install, reducing labor expenses.
5. Removal of Existing Roof
If you’re replacing an old roof, the cost of removing the existing roofing material must also be factored into the total cost. The removal of old shingles or tiles typically adds $1 to $3 per square foot to the overall project cost. The age and condition of the current roof can affect the difficulty of removal, and if there’s any hidden damage, additional repairs may be needed.
6. Geographic Location in New Jersey
Roofing costs can fluctuate depending on where you are located within New Jersey. For example, roofing costs in Bergen County or Monmouth County may differ from costs in more rural areas like Sussex County due to the cost of living and availability of skilled labor. Additionally, areas near the coast, such as Atlantic City, may require specialized roofing materials like aluminum to resist corrosion from saltwater.
Cost Breakdown for a 2000 Sq Ft Metal Roof
To estimate how much it will cost to install a metal roof on a 2000 sq ft house in New Jersey, let’s break down the costs based on the various factors discussed.
- Steel Roof (Basic Option): $5 to $12 per square foot.
- Total cost for a 2000 sq ft house: $10,000 to $24,000.
- Aluminum Roof (Mid-range Option): $7 to $15 per square foot.
- Total cost for a 2000 sq ft house: $14,000 to $30,000.
- Copper Roof (Premium Option): $15 to $30 per square foot.
- Total cost for a 2000 sq ft house: $30,000 to $60,000.
In addition to the roofing material, the labor cost will typically range from $2,000 to $5,000 for a 2000 sq ft roof. Removing the old roof could add another $2,000 to $4,000 to the total cost.
Average Total Cost for Metal Roofing in New Jersey
Taking all the above factors into account, homeowners in New Jersey can expect to pay between $12,000 and $50,000 for a metal roof on a 2000 sq ft home. This estimate includes both materials and labor. If you’re replacing an old roof or opting for premium materials like copper, you could find yourself closer to the higher end of this range.
Additional Costs to Consider
Beyond the base cost of installation, there are other potential expenses to be aware of when installing a metal roof:
- Underlayment: Some metal roofing systems require an additional underlayment to enhance waterproofing and insulation. This can add $1 to $3 per square foot.
- Roof Flashing: Flashing around chimneys, skylights, and vents helps prevent leaks. Expect to pay an additional $500 to $1,500 for flashing, depending on the complexity of the installation.
- Warranties: Many metal roofing manufacturers offer warranties ranging from 20 years to a lifetime. Be sure to factor in any extended warranty costs, as they can add to the overall project expense.
Long-Term Savings and ROI
Although the upfront cost of installing a metal roof can be higher than traditional roofing materials, the long-term benefits can result in significant savings. Metal roofs are highly energy-efficient, reflecting heat from the sun and keeping your home cooler during the summer months, which can reduce your cooling costs. Additionally, the durability and low maintenance requirements of metal roofs mean that you won’t have to worry about frequent repairs or replacements.
Conclusion
The cost of installing a metal roof on a 2000 sq ft house in New Jersey ranges between $12,000 and $50,000, depending on the type of metal roofing material, labor costs, and additional factors such as roof design and removal of the old roof. While the initial investment may be higher than traditional roofing materials, the long-term durability, energy savings, and minimal maintenance requirements make metal roofing a wise choice for homeowners in New Jersey. Make sure to consult with a local roofing contractor like CJ Commercial Roofing NJ to get an accurate estimate tailored to your home and specific needs.
For more information or to get a free roofing consultation, contact trusted New Jersey roofing experts today!