New England Industrial Uncategorized How Do I Find a Leak in My Gutter? A Homeowner’s Guide for Melbourne, Australia

How Do I Find a Leak in My Gutter? A Homeowner’s Guide for Melbourne, Australia

Fixing roof gutter near downspout.

How Do I Find a Leak in My Gutter? A Homeowner’s Guide for Melbourne, Australia

Gutters are the unsung heroes of your home’s roofing system, quietly directing rainwater away from your foundation and protecting your walls, windows, and landscaping from water damage. But what happens when they stop doing their job properly? You’re left asking: “How do I find a leak in my gutter?” This seemingly simple question is one that many Melbourne homeowners ask—especially during Victoria’s unpredictable wet seasons.
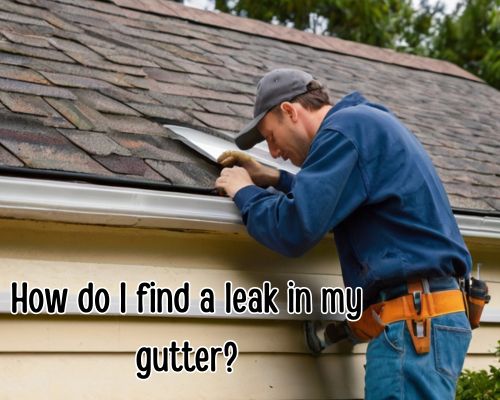
Fixing roof gutter near downspout.

In this guide, we’ll walk you through the most efficient ways to detect gutter leaks, why it matters, the common causes in Melbourne’s climate, and how to address them before they snowball into costly repairs. Whether you live in Brunswick, Frankston, or the leafy streets of Camberwell, spotting a leak early could save you thousands in structural damage.

Why Gutter Leaks Are a Big Deal in Melbourne

Melbourne’s climate, classified as oceanic, brings heavy rain in winter and unexpected downpours throughout the year. Combine that with gum leaves from native eucalyptus trees or silt from frequent winds, and your gutter system can take a beating. Over time, wear and tear from UV rays, corrosion due to salty coastal air (particularly in areas like St Kilda and Brighton), and improper gutter slope can lead to leaks.

Ignoring even a small leak can result in:

  • Soil erosion around your home’s perimeter
  • Sagging fascia boards and roof damage
  • Mould growth inside walls
  • Water ingress into foundations or basements

So the sooner you identify a gutter leak, the better.

Signs You Might Have a Gutter Leak

Before you even climb a ladder, look for these telltale signs:

  1. Drips or Water Stains on the exterior walls
  2. Pooling Water near the base of your home after rain
  3. Discolouration or streaking on the gutters themselves
  4. Peeling Paint on the siding or under the eaves
  5. Visible Gaps or Cracks when inspecting from ground level

Step-by-Step: How Do I Find a Leak in My Gutter?

1. Inspect During a Rainfall (Safely)

There’s no better time to spot an active leak than during a light rain shower. With an umbrella in one hand and a keen eye, walk the perimeter of your home. Look for drips or water escaping from seams, joints, or mid-gutter areas.

Pro Tip: In Melbourne’s frequent drizzle, this method is convenient—just wait for a dry break to do repairs. You may also see gutter services for your needs.

2. Run a Hose Test

Can’t wait for rain? Use a garden hose. Start at the gutter’s high point and slowly run water through. Have a second person watch from below to identify leaks or odd water flows. Note any water that spills over the side or drips where it shouldn’t.

3. Climb Up for a Close Inspection

Once it’s safe and dry, use a sturdy ladder to get eye-level with your gutters:

  • Check seams and joints—these are common fail points, especially in sectional gutters.
  • Inspect corners and end caps for small cracks or gaps.
  • Look for rust spots or pinholes in older metal gutters.
  • Remove debris like gum leaves or bird nests that may be hiding the source of a leak.

If your home has a Colorbond roof, common in Melbourne suburbs like Doncaster or Glen Waverley, check where gutters meet rooflines as shifting panels may stress the gutter brackets over time.

4. Don’t Forget Downpipes and Flashing

Sometimes, what seems like a gutter leak is actually a damaged downpipe or faulty flashing where the roof meets the gutter. Listen for odd drips or splashes in the downpipe or inspect around flashing areas for water trails.

Common Causes of Gutter Leaks in Melbourne Homes

  • Clogged Gutters: Eucalyptus leaves and dust are common clog culprits in Melbourne. Blockages create overflow that mimics a leak.
  • Worn Seals and Loose Screws: Over time, UV and heat cycles degrade rubber seals and loosen gutter hardware.
  • Rust and Corrosion: Older steel gutters, especially near the bay or in high-salt air zones like Port Melbourne, are prone to rust.
  • Improper Slope or Installation: A poorly sloped gutter doesn’t drain correctly, leading to standing water and eventual corrosion.

Fixing a Gutter Leak: DIY or Pro?

If the leak is minor, a DIY patch may suffice:

  • Silicone sealant can plug small holes or seal seams.
  • Gutter repair tape works well in dry conditions.
  • Replacement of short sections may be needed for larger cracks.

But for large leaks, multiple failure points, or complex roofing systems, hiring a local gutter professional (see gutter services) in Melbourne is wise. Many offer free roof and gutter inspections and will understand how to handle unique local challenges like tile roofs or weatherboard exteriors.

Look for licensed roof plumbers with experience in your suburb. Services in Carlton might focus on terrace homes with cast iron downpipes, while those in Rowville may be more accustomed to Colorbond and aluminum installations.

Prevent Future Leaks: Proactive Maintenance Tips

  1. Schedule Biannual Gutter Cleaning
    Especially in autumn and spring. Use gutter guards if gum trees surround your property.
  2. Install Gutter Guards
    Mesh gutter covers prevent debris accumulation—popular among homeowners in suburbs like Eltham or Greensborough where trees dominate.
  3. Get Annual Inspections
    Many Melbourne roofing companies offer yearly checkups, often bundled with roof tile inspections.
  4. Replace Aging Gutters
    If your gutters are over 20 years old and showing signs of frequent failure, consider replacing them with modern, seamless options or corrosion-resistant materials.

Local Resources and Services in Melbourne

  • Victorian Building Authority (VBA): Check licenses for roof plumbers and guttering professionals.
  • Your Local Council: Offers green waste pickup and may provide advice for stormwater compliance.
  • SES Victoria: Offers emergency support during flooding events from gutter overflow.

Final Thoughts: Spot It Early, Fix It Fast

So, how do I find a leak in my gutter? It begins with vigilance. With Melbourne’s climate, it pays to be proactive. A simple walk around your home, a hose test, and a ladder inspection can help you pinpoint issues before they turn into major damage. And whether you’re in the eastern suburbs or bayside, investing in regular gutter maintenance ensures your home stays dry and damage-free year-round.

When in doubt, always consult a local guttering expert to ensure a permanent fix tailored to your property type and suburb-specific needs.

Related Post

A roofer works meticulously, securing the gutter in place on a steep roof

Why is Guttering So Expensive? A Comprehensive Guide for Melbourne HomeownersWhy is Guttering So Expensive? A Comprehensive Guide for Melbourne Homeowners

Why is Guttering So Expensive? A Comprehensive Guide for Melbourne Homeowners

When it comes to maintaining a home, many homeowners in Melbourne, Australia, overlook the importance of guttering. Gutters are essential in redirecting rainwater away from your property, protecting your foundation, landscaping, and the structure of your home. However, one question often arises when it’s time for repairs or installation: Why is guttering so expensive? With Steve Arnie of Gutter Cleaning Melbourne, we’ll delve into the reasons behind the high costs of guttering and provide useful tips for Melbourne homeowners looking to manage the expense.

A roofer works meticulously, securing the gutter in place on a steep roof

Understanding the Role of Gutters in Your Home’s Protection

Guttering systems are designed to protect your home from water damage. In Melbourne, where rainfall can be unpredictable, gutters are essential for directing water away from your roof and foundation. They prevent water from collecting around your home’s base, which could cause erosion, flooding, or even damage to your property’s structural integrity.

While gutters are critical, their installation and maintenance are not always cheap. Several factors contribute to the expense of guttering, and it’s essential for Melbourne homeowners to understand these to make informed decisions.

1. Material Costs: The Foundation of Your Guttering System

One of the main reasons why guttering can be so expensive is the material used. Gutters are available in a variety of materials, each with its own set of costs and benefits. Some of the most common materials include:

  • Aluminium: Lightweight, rust-resistant, and durable, aluminium gutters are a popular choice in Melbourne. However, they come at a higher price point compared to PVC.
  • Copper: Known for its longevity and aesthetic appeal, copper gutters are high-end options. These tend to be the most expensive due to their superior durability and ability to resist corrosion.
  • Steel: Galvanized steel or stainless steel gutters are also durable and resistant to corrosion but are generally more expensive than aluminium.
  • PVC: While PVC gutters are the cheapest option, they may not last as long as other materials, leading to higher long-term costs due to maintenance or replacement.

The material you choose directly affects the cost of guttering. Homeowners in Melbourne often opt for aluminium or steel for their resilience to the local weather conditions. However, for those living in coastal areas, copper may be a long-lasting choice despite the higher upfront cost.

2. Labour Costs: Professional Installation Is Key

Installing gutters is not a DIY job. Professional guttering services in Melbourne are required to ensure proper installation. The expertise of trained professionals is needed to ensure the gutters are pitched correctly, sealed properly, and securely fixed to your home.

In Melbourne, the average cost of professional gutter installation can vary depending on the size of the house, the type of guttering chosen, and the complexity of the installation. A larger property or a home with a more intricate roofline will require more time and effort from the installer, which can significantly increase the overall cost.

Additionally, Melbourne’s building codes and regulations can also influence the cost of installation. Depending on where you live in Melbourne, you may need to adhere to specific requirements for guttering systems, which could increase the cost of materials and labour.

For professional needs, just visit https://gutter-cleaning-melbourne.com.au/.

3. Maintenance and Repairs: Preventative Care

Like any other part of your home, gutters need regular maintenance to ensure they function correctly. Gutter cleaning and repairs can add up over time, contributing to the overall cost of guttering. In Melbourne, where the seasons change dramatically, gutters can accumulate leaves, debris, and even moss, leading to blockages and potential water damage.

Regular gutter cleaning helps prevent expensive repairs by ensuring that water flows freely through your gutters. Some professional services offer annual gutter maintenance packages, which may seem costly but can save you money in the long run by preventing major issues.

Ignoring gutter maintenance can result in costly repairs down the line. For instance, water pooling in clogged gutters can cause rust in metal gutters or damage the roof and fascia boards, leading to expensive repairs.

4. Size and Complexity of Your Gutter System

The size of your property and the complexity of your roofline play a significant role in the cost of gutter installation or replacement. Homes with multiple stories or complex roof designs in Melbourne may require specialized guttering systems, which could drive up the price.

Custom guttering systems, especially for homes with unique designs or historical properties in areas like Fitzroy or St Kilda, are typically more expensive to install due to the need for tailored materials and custom fittings. A complex installation will take longer to complete, and this time investment adds to the overall cost.

Furthermore, properties with larger roof areas or intricate detailing may require additional downspouts or specialized corner fittings, which increase both material and labour costs.

5. Climate and Weather Considerations in Melbourne

Melbourne’s ever-changing weather patterns also influence the cost of guttering. The city is known for its unpredictability, with heavy rainfall, wind, and even hailstorms. These weather conditions can place significant strain on your gutters, requiring more durable materials and frequent maintenance.

Gutter systems in Melbourne are designed to withstand these weather conditions, but they may come with a higher price tag. Additionally, homeowners may choose to upgrade to stronger or more resilient guttering materials to ensure their home is protected during Melbourne’s wettest months, further driving up the cost.

6. Hidden Costs and Long-Term Value

While the upfront cost of guttering may seem high, it’s essential to consider the long-term value. Investing in high-quality guttering now can save you money on future repairs and water damage prevention. For example, a durable aluminium or copper gutter system may cost more initially, but it will require fewer repairs and replacements over the years.

Furthermore, high-quality gutters can enhance the curb appeal of your home, particularly if you choose a style that complements the design of your property. This can add value to your Melbourne home in the long run, making it a worthwhile investment.

Tips for Saving on Guttering in Melbourne

While guttering can be expensive, there are ways to reduce the cost without sacrificing quality:

  • Get Multiple Quotes: Always get at least three quotes from reputable guttering companies in Melbourne. This helps you compare prices and services to ensure you’re getting the best value for your money.
  • Consider Regular Maintenance: Rather than waiting for problems to arise, invest in regular maintenance. Many Melbourne guttering companies offer annual cleaning and inspection services, which can save you money in the long run.
  • DIY Cleaning: If you’re comfortable with the task, consider cleaning your gutters yourself. However, always prioritize safety and seek professional help if needed.
  • Choose the Right Materials: While PVC gutters are cheaper, investing in higher-quality materials like aluminium or steel can save you money on repairs and replacements over time.

Conclusion

Understanding why guttering is so expensive in Melbourne can help homeowners make informed decisions when it comes to installation and maintenance. Material costs, professional labour, maintenance, and the complexity of the installation all contribute to the high price tag of guttering systems. However, considering the long-term benefits and the protection that gutters provide for your home, the investment is undoubtedly worth it. By selecting the right materials, hiring skilled professionals, and maintaining your gutters regularly, you can ensure your Melbourne home remains protected from the elements for years to come.

a good cabinet in home made and installed by a cabinet maker

Are Cabinets Made to Resist Moisture in Coastal Mornington Homes?Are Cabinets Made to Resist Moisture in Coastal Mornington Homes?

Are Cabinets Made to Resist Moisture in Coastal Mornington Homes?

Living in a coastal area like Mornington, Australia, presents a unique set of challenges for homeowners. One such challenge is the constant exposure to moisture, humidity, and salty air, all of which can wreak havoc on furniture and fittings within a home. One crucial aspect of a home’s interior that often faces the brunt of this is the cabinetry. So, the question arises: are cabinets made to resist moisture in coastal Mornington homes?

a good cabinet in home made and installed by a cabinet maker

With Leona Rodriguesi of Mornington Cabinet Makers, we’ll dive into the importance of moisture resistance for cabinets in coastal areas like Mornington and explore how you can ensure your cabinetry withstands the unique environmental factors found in this region.

Understanding the Impact of Coastal Climate on Homes

Mornington is known for its stunning coastal views, with its proximity to the ocean providing a beautiful and relaxed lifestyle. However, along with the beauty of the sea comes a consistent presence of saltwater and high humidity, both of which have a significant impact on the longevity and durability of materials used in homes.

Salt air is especially problematic as it accelerates the deterioration of materials, including wood. The high levels of moisture in the air can cause wood to swell, warp, or even develop mold and mildew. For homeowners in Mornington, this means that materials not specifically designed to withstand these conditions will degrade much faster than expected.

Why Moisture Resistance Matters for Cabinets

Cabinets are an essential part of any kitchen, bathroom, or laundry room. They store everything from food to cleaning products, all while withstanding the daily use and wear and tear that comes with family life. In coastal areas like Mornington, the increased moisture in the environment poses a risk to the structural integrity of cabinets.

Without proper moisture resistance, the wood in cabinets can absorb excess humidity, leading to several issues:

  • Warping: Moisture causes wood to expand, leading to deformation that can cause cabinet doors and drawers to not close properly.
  • Swelling: When wood absorbs moisture, it swells and may become difficult to open or close.
  • Rot: Long-term exposure to high levels of moisture can lead to wood decay and mold growth, which can severely compromise the structural integrity of cabinets.
  • Fading and Discoloration: The continuous exposure to moisture, salt, and UV rays can cause the cabinet finish to fade or change color, diminishing the aesthetic appeal of your home.

What Are the Best Materials for Coastal Cabinets?

When it comes to cabinetry in coastal Mornington homes, choosing the right materials is crucial for long-term durability and resistance to moisture. The most common cabinet materials used in the area include wood, MDF (medium-density fiberboard), plywood, and laminated surfaces. Each material has its pros and cons when it comes to resisting moisture.

1. Marine Plywood

Marine plywood is often the best choice for coastal homes due to its high moisture resistance. It’s designed specifically to withstand the conditions found near bodies of water and is made with water-resistant adhesives. Unlike standard plywood, marine plywood is constructed with fewer voids and more uniform layers, ensuring maximum strength and moisture resistance.

Marine plywood is an excellent choice for cabinets in kitchens, bathrooms, and other spaces that are prone to high humidity, especially in coastal Mornington homes where the risk of moisture exposure is higher.

2. Moisture-Resistant MDF

MDF is a popular choice for modern cabinets due to its smooth surface and versatility. However, standard MDF can absorb moisture, leading to swelling and damage. To address this, moisture-resistant MDF is now available, and it is an ideal choice for homes located in coastal areas.

The moisture-resistant version of MDF is treated with special resins that protect it from absorbing water and moisture, making it a more suitable material for coastal Mornington homes.

3. Laminated Surfaces

Laminated cabinet surfaces offer an additional layer of protection against moisture. These surfaces are usually made from MDF or plywood and then covered with a plastic laminate, providing an impermeable barrier against moisture. The laminate is resistant to water, stains, and heat, making it a great option for kitchens and bathrooms in coastal areas.

One of the major advantages of laminated surfaces is their wide variety of finishes and colors, allowing homeowners to achieve the aesthetic they desire while ensuring durability in a humid climate.

4. Solid Wood (with Proper Treatment)

While solid wood is a classic material for cabinets, it’s not the best option for coastal areas unless treated properly. Unprotected solid wood is prone to absorbing moisture, which can lead to warping and rotting over time. However, wood cabinets treated with high-quality water-resistant finishes or sealed with specialized coatings can withstand the moisture present in coastal environments.

Wood species such as teak or oak are known for their natural resistance to moisture, making them better suited for areas like Mornington.

For professional needs, just visit https://morningtoncabinetmakers.com.au/.

Protective Finishes for Coastal Cabinets

Choosing the right material is just the first step. Ensuring that your cabinets are properly sealed and protected with the right finish can go a long way in extending their lifespan. Some protective finishes include:

  • Polyurethane Coatings: These coatings provide a durable, water-resistant layer over wood, preventing moisture absorption.
  • Varnishes: Marine varnishes are often used for cabinets in coastal areas because they provide a tough, water-resistant layer that also protects against UV rays and salt air.
  • Wax Finishes: Natural waxes can be used to create a water-resistant layer, though they may require more maintenance over time.

By applying one of these finishes, you can significantly improve the moisture resistance of your cabinets, making them a more viable option for coastal Mornington homes.

Regular Maintenance to Prevent Moisture Damage

Even the best moisture-resistant cabinets will need regular maintenance to ensure their longevity in a coastal environment. Regularly checking for signs of wear and tear, such as peeling finishes, warping doors, or discoloration, is essential. Additionally, ensuring good airflow in cabinets can help prevent excess moisture buildup.

Routine cleaning with gentle, non-abrasive products will also ensure that the protective finishes on your cabinets remain intact.

Conclusion: Choosing the Right Cabinets for Coastal Mornington Homes

In conclusion, when selecting cabinets for a coastal home in Mornington, it’s essential to focus on materials and finishes that are specifically designed to resist moisture. Marine plywood, moisture-resistant MDF, laminated surfaces, and properly treated solid wood are all excellent options that can stand up to the challenges presented by the coastal climate.

By carefully choosing the right materials, applying protective finishes, and committing to regular maintenance, homeowners in Mornington can enjoy durable, long-lasting cabinets that resist moisture and remain functional and attractive for years to come. Whether you’re renovating an existing home or building a new one, protecting your cabinets from the harsh coastal elements is an investment that will pay off in the long run.

slab in commercial building construction

What is the Thickness of Roof Slab for Commercial Building? A Deep Dive for New Jersey ProjectsWhat is the Thickness of Roof Slab for Commercial Building? A Deep Dive for New Jersey Projects

What is the Thickness of Roof Slab for Commercial Building? A Deep Dive for New Jersey Projects

When it comes to commercial construction in New Jersey, understanding structural specifications like roof slab thickness is essential—not just for compliance and performance but also for longevity, safety, and cost efficiency. So, what is the standard thickness of a roof slab in a commercial building?

slab in commercial building construction

While it may seem like a simple measurement, the roof slab thickness in commercial structures depends on multiple variables including building codes, structural load demands, architectural design, and regional climate considerations. In New Jersey, where the weather fluctuates from humid summers to snowy winters, slab design is influenced by environmental stressors and local code requirements.

With Charles Jimerson of CJ Commercial Roofing NJ, we’ll unpack:

  • The typical roof slab thickness for commercial buildings
  • Factors influencing slab design
  • Building code references in New Jersey
  • Types of materials used
  • Local considerations unique to New Jersey’s climate and construction norms

Typical Thickness of Roof Slabs in Commercial Construction

In general, the standard roof slab thickness for commercial buildings in the U.S. ranges between 5 inches and 8 inches (127 mm to 203 mm). However, New Jersey-based commercial projects often adopt 6-inch slabs as a minimum, scaling up depending on load-bearing demands or special architectural considerations.

Why the Range?

The variation is due to:

  • Dead loads (weight of the structure itself)
  • Live loads (people, equipment, or HVAC units on the roof)
  • Environmental loads (snow, wind uplift)

A flat roof on a commercial warehouse in Newark, NJ, for example, might use a 6-inch reinforced concrete slab. In contrast, a multi-story office building in Jersey City may require a post-tensioned concrete slab closer to 8 inches to handle mechanical installations and future tenant improvements.

Key Factors That Influence Slab Thickness

Several engineering and environmental parameters come into play:

1. Structural Load Requirements

Every roof slab is engineered to handle expected live and dead loads. The American Concrete Institute (ACI 318) offers guidelines, and structural engineers in New Jersey often refer to this in tandem with IBC (International Building Code) provisions.

2. Span Between Supports

Longer spans without intermediate support beams require thicker slabs or advanced reinforcement like post-tensioning. In commercial retail outlets or large logistics centers in Edison, NJ, slabs may increase in thickness to prevent deflection over long spans.

3. Roof Type & Usage

A green roof or rooftop terrace requires additional thickness to support soil, plantings, and pedestrian traffic. These applications are increasingly popular in urban centers like Hoboken, where real estate is optimized vertically.

4. Climate and Weather Conditions

In New Jersey, snow loads play a significant role. According to the New Jersey Uniform Construction Code (NJ UCC), structures must account for average snowfall loads between 20 and 30 pounds per square foot, particularly in northern counties like Morris and Sussex.

For more, visit https://cjcommercialroofingnj.com/.

Material Considerations: Concrete Composition and Reinforcement

Most commercial roof slabs use reinforced concrete—a mix of cement, water, aggregates, and steel reinforcement (rebar or wire mesh). Here’s what commonly goes into a New Jersey commercial roof slab:

  • Compressive strength: Usually 4,000 to 5,000 psi
  • Reinforcement: Grade 60 steel rebar, spaced per structural load demands
  • Slump: A medium slump (4 to 6 inches) ensures workable concrete without compromising strength

For projects requiring lightweight alternatives, lightweight concrete (using expanded shale or clay aggregate) is sometimes used, especially in retrofits or rooftop additions in older commercial buildings in cities like Trenton.

Local Building Code & Regulations in New Jersey

To legally construct commercial buildings in the Garden State, builders must comply with:

These codes regulate slab thickness indirectly by mandating load capacity, deflection limits, and allowable material stresses. For example, commercial roofs must meet wind uplift ratings prescribed for coastal zones like Atlantic City, where hurricane exposure is a concern.

It’s also worth noting that zoning ordinances and municipal building codes may add specific height and massing constraints, indirectly affecting slab thickness and overall roof design.

Real-World Examples from New Jersey

Let’s look at a few real-world applications that illustrate the range and logic behind slab thickness in local commercial construction:

Logistics Facility in South Brunswick

  • Slab Thickness: 6.5 inches
  • Reinforcement: Double mat rebar grid
  • Reasoning: Heavy equipment and HVAC units mounted on rooftop

Tech Campus in Princeton

  • Slab Thickness: 7.5 inches
  • Reinforcement: Post-tensioned concrete
  • Reasoning: Future adaptability for rooftop solar arrays and structural loading flexibility

Mixed-Use Retail in Montclair

  • Slab Thickness: 6 inches
  • Reinforcement: Fiber-reinforced concrete
  • Reasoning: Lightweight requirement due to existing substructure

How Slab Thickness Impacts Cost and Construction Timeline

Choosing a thicker slab increases material costs (more concrete and steel), labor (formwork, pouring, curing), and possibly inspection fees. However, the trade-off is durability and flexibility. In high-traffic commercial zones like Newark or Elizabeth, slab integrity directly translates to fewer long-term maintenance issues.

A typical cost estimate for roof slab construction in New Jersey (as of 2025) ranges from $7.50 to $12 per square foot, depending on thickness and design complexity. Specialized slabs (like post-tensioned or high-load green roof systems) can run higher.

Sustainable Trends in Commercial Roof Slabs

With New Jersey adopting green building initiatives under the Energy Master Plan (EMP) and Clean Energy Program, newer commercial buildings are integrating insulated roof decks, thermal mass concrete, and green roofing systems.

These sustainable approaches may demand slight variations in slab thickness—either to accommodate insulation materials or to support added mass from soil and vegetation. Municipalities like Morristown and Camden have already adopted green-friendly incentives for such structural innovations.

Conclusion: Precision Matters in Roof Slab Design

To answer the question directly: the roof slab thickness for a commercial building in New Jersey typically ranges from 6 to 8 inches, but that number can vary based on design purpose, location, building code, and intended roof usage.

More importantly, the “right” thickness is not a one-size-fits-all number—it’s an intersection of engineering precision, regulatory compliance, local climate adaptation, and cost-effective construction strategies.

If you’re planning a commercial build in New Jersey—from Paramus to Cherry Hill—work closely with a local structural engineer and code consultant to ensure the roof slab is not just thick enough, but also smartly designed for performance, durability, and future adaptation.

-